Pre-Word and Disclaimer
This guide may not be published, broadcast, rewritten or redistributed in whole or part with out the express written permission of Slavik at XenForo.com. The author takes no responsbility for any steps, in part, or in whole, undertaken by users of this guide and does not guarantee against any losses, material or otherwise.
Introduction
In Part 2 of this guide you installed PHP, did some basic MySQL configuration, configured LiteSpeed to serve files on port 80, and set up basic IP Tables.
In Part 3, we will install PhpMyAdmin in a secured location, install XenForo, and enable APC's opcode caching.
Prerequisites
Completed Part 2.
Installation Guide
So lets start off with installing PhpMyAdmin. First in putty lets go to the protected folder we will use.
Then grab PhpMyAdmin, and unzip it.
Next, move all the files into the correct place, and remove what we dont need.
Next, turn on the default PhpMyAdmin settings.
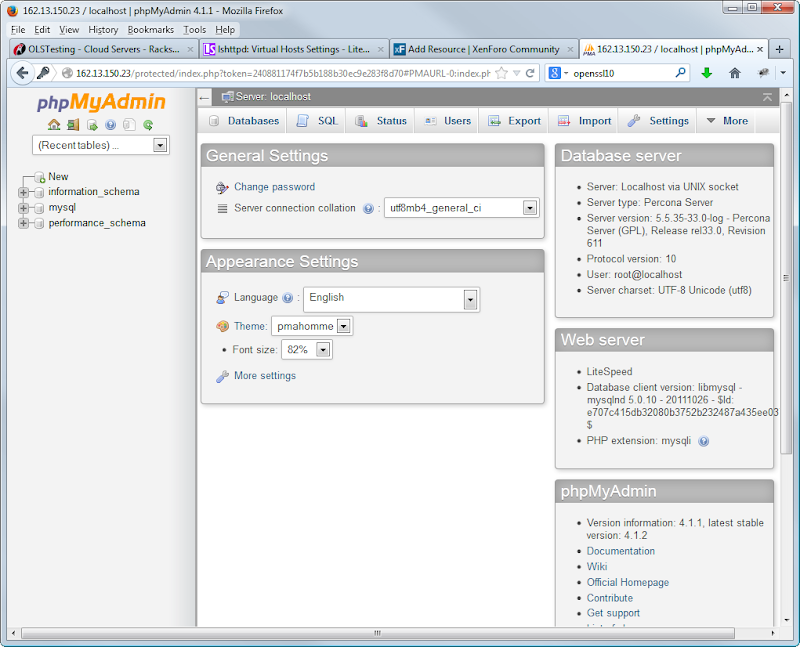
You can now open your browser and navigate to http://YOURSERVERIP/protected/index.php
When prompted enter the username "test" and the password "test123" which will allow you in to the main login screen. From here, log into PhpMyAdmin using the username root, and the MySQL password you chose in part 1 of the guide.
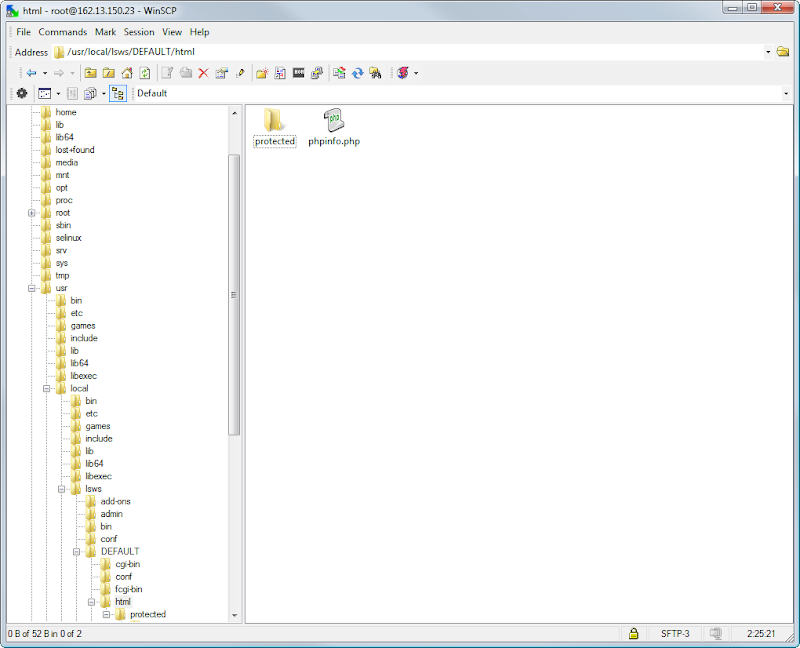
Now lets install XenForo. In WinSCP navigate to /usr/local/lsws/DEFAULT/html
In this directory you can clean it up by deleting the blocked directory, the poweredby_openlitespeed.png and the 2 html files. Keep the phpinfo.php file for now.
Drag a copy of your XenForo zip into the directory and then head to putty.
Unzip your XenForo file (you will need to alter the license ID string to match your own).
Then move the files to the correct place.
And some cleanup.
Now to install XenForo firstly we need to set the correct permissions to the data and internal_data folder and create the config file.
Next lets create a database and user we can use, you can either do this via PhpMyAdmin if you prefer, or, we will do it via Putty.
When promted enter your mysql password you set up previously in part 1.
So first create the database.
Now create a user and give it access to the database, alter the password as required.
And finally give it permissions.
And exit mysql

In WinSCP navigate to /usr/local/lsws/DEFAULT/html/library and open the config.php file.
In here edit the details to match the settings you used when creating the database and user. Save and close the file.

In your browser, navigate to http://YOURSERVERIP/index.php and follow the on screen steps to install XenForo.
Congratulation, your all done! Well, not quite, we still have a few quick steps to once again take care of security and other general housekeeping.
First in your OpenLiteSpeed admin panel navigate to Configuration > Virtual Hosts and click View/Edit on the Example Virtual Host and then click General.
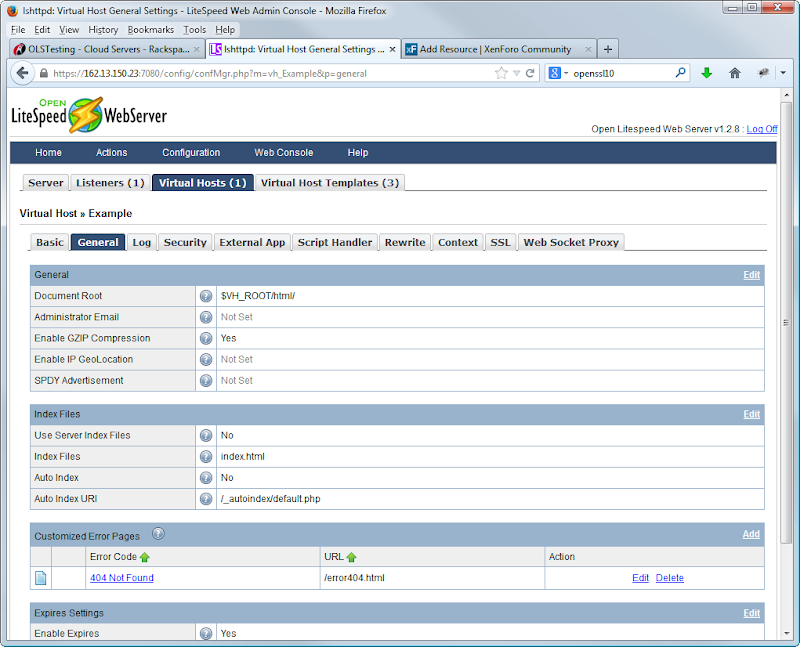
Under Customized Error Pages hit delete for the 404.html file that we removed earlier (alternatively, create your own custom 404 page and config it here!)
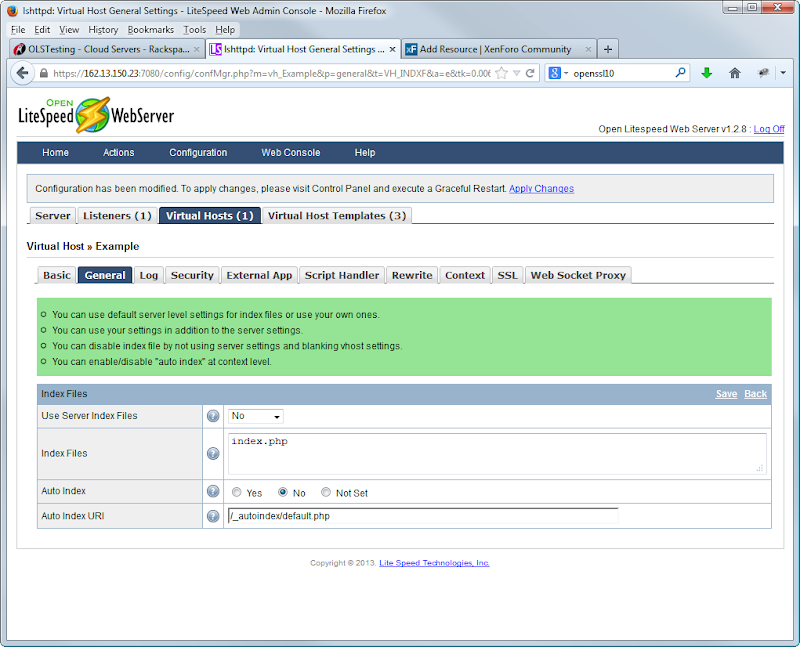
Confirm the delete and when the page loads back to the General Tab click edit for the "Index Files".
On this screen alter index.html to index.php then hit Save.
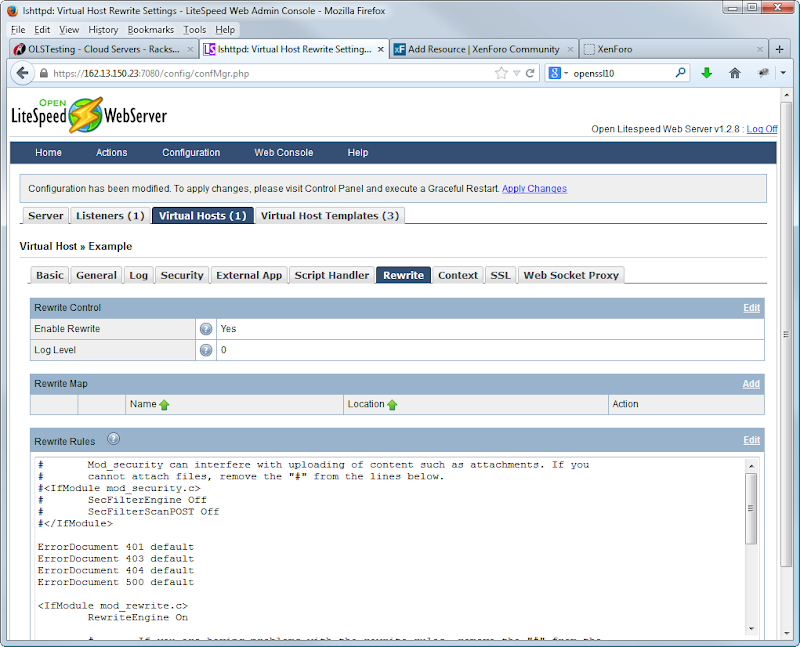
Next, click the Rewrite tab and edit "Rewrite Control" to "Enable Rewrites", hit save. Edit the "Rewrite Rules" and copy the rules from the htaccess.txt from your XenForo zip file here, hit Save.
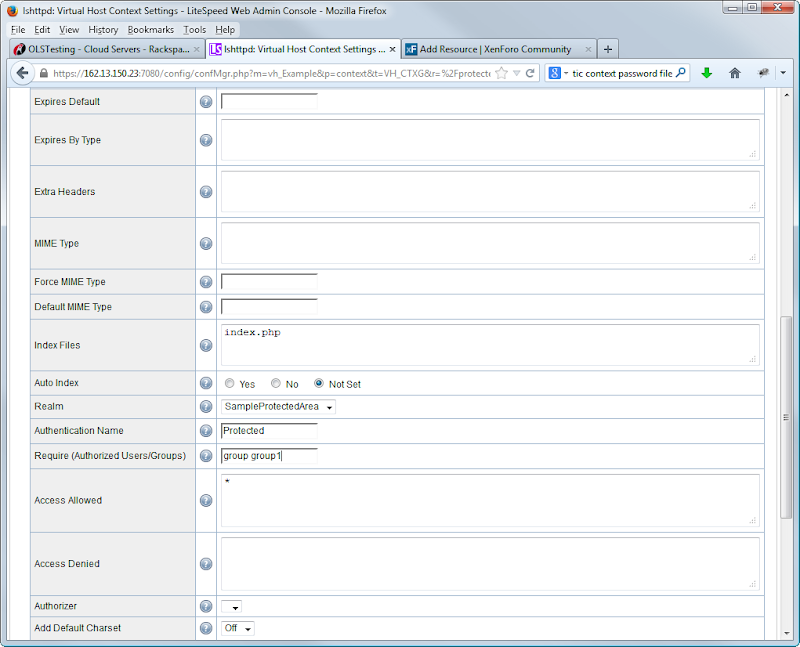
Next, click the Contexts tab, and delete all contexts apart from /protected/. Now edit the /protected/ context and alter the Require (Authorized Users/Groups) field from "user test" to "group group1" and enter "index.php" in the Index Files box, then hit Save.
Once done, click Actions > Graceful Restart and click OK.
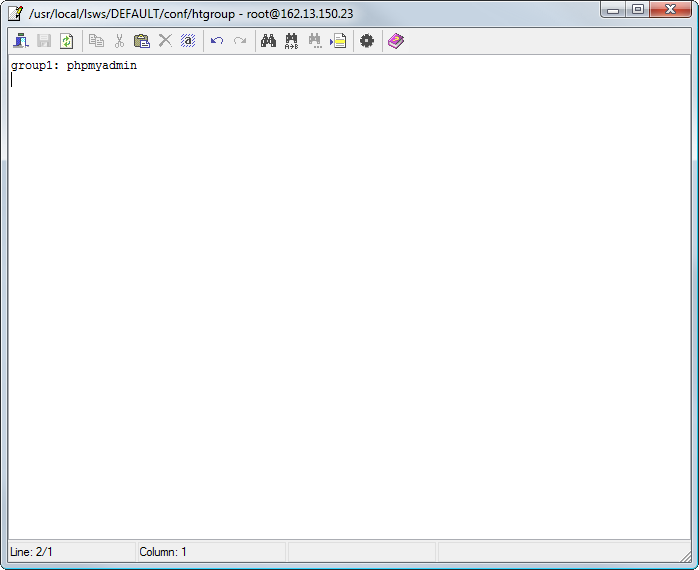
Finally, in WinSCP, navigate to /usr/local/lsws/DEFAULT/conf and open the htgroup file.
In here, delete everything and replace with the following, I have used "phpmyadmin" as the username I wish to access the phpmyadmin protected folder with, alter as you wish.
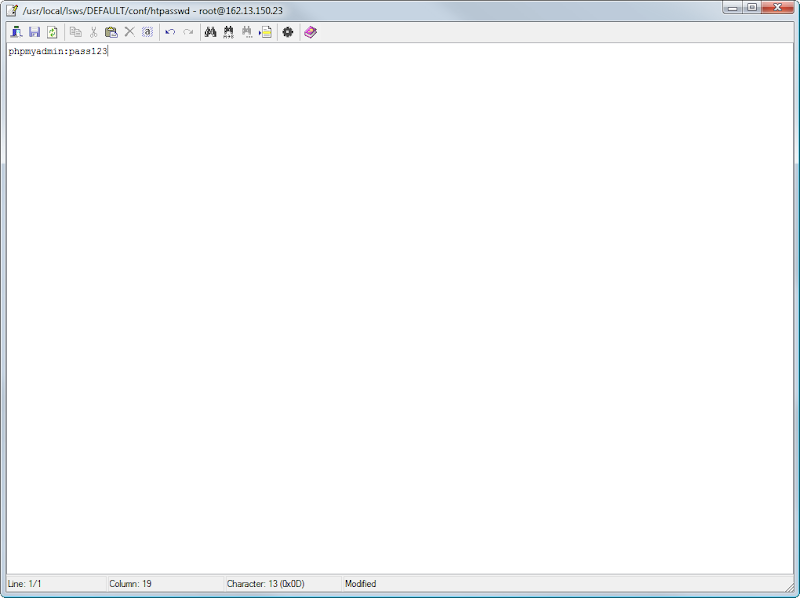
Save and close, then open up the htpasswd file.
In here, add the following, replacing pass123 with your own desired password.
Hit save then close.
Give it a test by going to http://YOURSERVERIP/protected/ and making sure that your new chosen username and password work.
The final thing to do is add in APC to the server for its opcode caching capabilities.
Simply navigate in WinSCP to /usr/local/lsws/lsphp5/lib and open up the php.ini file.
At the top, add in
Save, then close

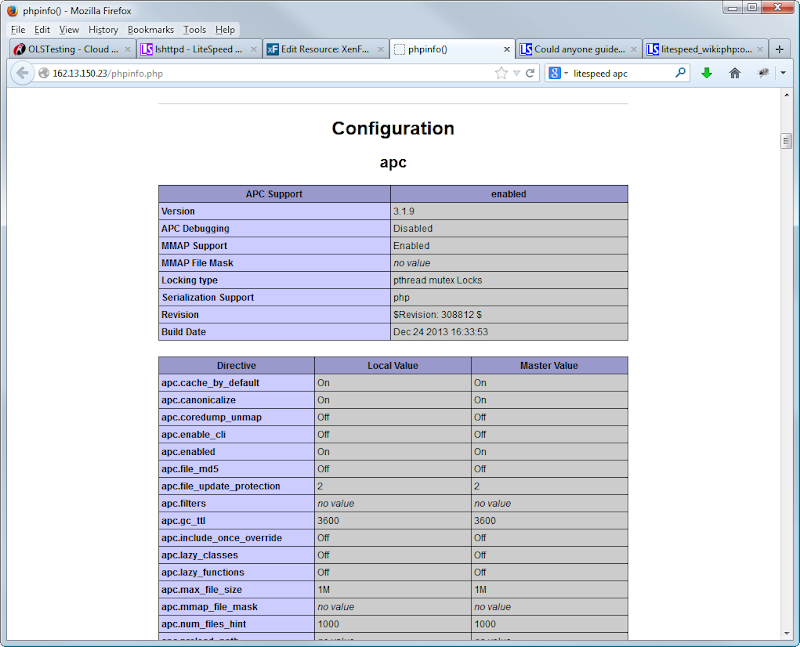
Go back to the LiteSpeed Admin Panel and perform a graceful restart. For one last time, open up http://YOURSERVERIP/phpinfo.php and check for the APC section. If it is there, then you can now delete the phpinfo.php file.
And with that....
We are all done!
Congratulations If you made it this far, you now have a server on CentOS 6, using OpenLiteSpeed and Percona to power XenForo. You have PhpMyAdmin available if needed and password protected, and are using basic IP Tables to stop unwanted guests.
How far you wish push your knowledge and learning from this point is up to you, but hopefully these fundamentals will be a good starting block.
If you are a new to system administration, I would still reccomend using an experienced admin until you are completely comfortable managing your own server.
Items not covered in these guides but reccomended include.
Changing your default SSH port.
Enabling SSL (especially for PhpMyAdmin)
Renaming the vHost paths from /DEFAULT/
Renaming the /protected/ folder to something more, obscure.
Assigning a domain name to the server.
So, hop to it! Go work out how to do the 5 points above.
This guide may not be published, broadcast, rewritten or redistributed in whole or part with out the express written permission of Slavik at XenForo.com. The author takes no responsbility for any steps, in part, or in whole, undertaken by users of this guide and does not guarantee against any losses, material or otherwise.
Introduction
In Part 2 of this guide you installed PHP, did some basic MySQL configuration, configured LiteSpeed to serve files on port 80, and set up basic IP Tables.
In Part 3, we will install PhpMyAdmin in a secured location, install XenForo, and enable APC's opcode caching.
Prerequisites
Completed Part 2.
Installation Guide
So lets start off with installing PhpMyAdmin. First in putty lets go to the protected folder we will use.
Code:
cd /usr/local/lsws/DEFAULT/html/protected
Code:
wget http://downloads.sourceforge.net/project/phpmyadmin/phpMyAdmin/4.1.1/phpMyAdmin-4.1.1-all-languages.zip?r=http%3A%2F%2Fsourceforge.net%2Fprojects%2Fphpmyadmin%2F&ts=1387905632&use_mirror=kent
Code:
unzip phpMyAdmin-4.1.1-all-languages.zip
Code:
mv phpMyAdmin-4.1.1-all-languages/* /usr/local/lsws/DEFAULT/html/protected
Code:
rm -f phpMyAdmin-4.1.1-all-languages.zip
Code:
rm -Rf phpMyAdmin-4.1.1-all-languages
Code:
mv config.inc.php.sample config.inc.phpWhen prompted enter the username "test" and the password "test123" which will allow you in to the main login screen. From here, log into PhpMyAdmin using the username root, and the MySQL password you chose in part 1 of the guide.

Now lets install XenForo. In WinSCP navigate to /usr/local/lsws/DEFAULT/html
In this directory you can clean it up by deleting the blocked directory, the poweredby_openlitespeed.png and the 2 html files. Keep the phpinfo.php file for now.

Drag a copy of your XenForo zip into the directory and then head to putty.
Unzip your XenForo file (you will need to alter the license ID string to match your own).
Code:
unzip xenforo_1.2.4_A06F265840_full.zip
Code:
mv upload/* /usr/local/lsws/DEFAULT/html
Code:
rm -Rf upload
rm -f INSTALL-UPGRADE.txt
rm -f xenforo_1.2.4_A06F265840_full.zip
Now to install XenForo firstly we need to set the correct permissions to the data and internal_data folder and create the config file.
Code:
chmod 777 data
chmod 777 internal_data
mv library/config.php.default library/config.php
Next lets create a database and user we can use, you can either do this via PhpMyAdmin if you prefer, or, we will do it via Putty.
Code:
mysql -u root -pSo first create the database.
Code:
create database xenforo;
Code:
grant usage on *.* to xfuser@localhost identified by 'password';
Code:
grant all privileges on xenforo.* to xfuser@localhost;
Code:
exit;
In WinSCP navigate to /usr/local/lsws/DEFAULT/html/library and open the config.php file.
In here edit the details to match the settings you used when creating the database and user. Save and close the file.

In your browser, navigate to http://YOURSERVERIP/index.php and follow the on screen steps to install XenForo.
Congratulation, your all done! Well, not quite, we still have a few quick steps to once again take care of security and other general housekeeping.
First in your OpenLiteSpeed admin panel navigate to Configuration > Virtual Hosts and click View/Edit on the Example Virtual Host and then click General.

Under Customized Error Pages hit delete for the 404.html file that we removed earlier (alternatively, create your own custom 404 page and config it here!)
Confirm the delete and when the page loads back to the General Tab click edit for the "Index Files".
On this screen alter index.html to index.php then hit Save.

Next, click the Rewrite tab and edit "Rewrite Control" to "Enable Rewrites", hit save. Edit the "Rewrite Rules" and copy the rules from the htaccess.txt from your XenForo zip file here, hit Save.

Next, click the Contexts tab, and delete all contexts apart from /protected/. Now edit the /protected/ context and alter the Require (Authorized Users/Groups) field from "user test" to "group group1" and enter "index.php" in the Index Files box, then hit Save.
Once done, click Actions > Graceful Restart and click OK.

Finally, in WinSCP, navigate to /usr/local/lsws/DEFAULT/conf and open the htgroup file.
In here, delete everything and replace with the following, I have used "phpmyadmin" as the username I wish to access the phpmyadmin protected folder with, alter as you wish.
Code:
group1: phpmyadmin
Save and close, then open up the htpasswd file.
In here, add the following, replacing pass123 with your own desired password.
Code:
phpmyadmin:pass123
Give it a test by going to http://YOURSERVERIP/protected/ and making sure that your new chosen username and password work.
The final thing to do is add in APC to the server for its opcode caching capabilities.
Simply navigate in WinSCP to /usr/local/lsws/lsphp5/lib and open up the php.ini file.
At the top, add in
Code:
extension=apc.so
Go back to the LiteSpeed Admin Panel and perform a graceful restart. For one last time, open up http://YOURSERVERIP/phpinfo.php and check for the APC section. If it is there, then you can now delete the phpinfo.php file.

And with that....
We are all done!
Congratulations
How far you wish push your knowledge and learning from this point is up to you, but hopefully these fundamentals will be a good starting block.
If you are a new to system administration, I would still reccomend using an experienced admin until you are completely comfortable managing your own server.
Items not covered in these guides but reccomended include.
Changing your default SSH port.
Enabling SSL (especially for PhpMyAdmin)
Renaming the vHost paths from /DEFAULT/
Renaming the /protected/ folder to something more, obscure.
Assigning a domain name to the server.
So, hop to it! Go work out how to do the 5 points above.
