Pre-Word and Disclaimer
This guide may not be published, broadcast, rewritten or redistributed in whole or part with out the express written permission of Slavik at XenForo.com. The author takes no responsbility for any steps, in part, or in whole, undertaken by users of this guide and does not guarantee against any losses, material or otherwise.
Introduction
In Part 1 of this guide you updated the system, installed Percona MySQL Server and installed OpenLiteSpeed Web Server.
In Part 2, we will install PHP, do some basic MySQL configuration, configure LiteSpeed to serve files on port 80, and set up basic IP Tables.
Prerequisites
Completed Part 1.
Installation Guide
Firstly we will install PHP. OpenLiteSpeed offers 2 ways of doing this. Either via the web-based PHP configuration utility where you can select the PHP version, and then add your configure parameters, save it and then LiteSpeed will give you a command to run in the Putty client, or, alternatively we can use "yum" to install and maintain PHP for us.
Both ways of installing PHP have their advantages and disadvantages, however, whilst the yum option is easier to initially set up, compiling PHP ourselves via the OpenLiteSpeed Panel allows for greater control in the versions and what we compile PHP to run with.
So lets get PHP compiled.
First go to the OpenLiteSpeed Admin Panel.
And log in with the details
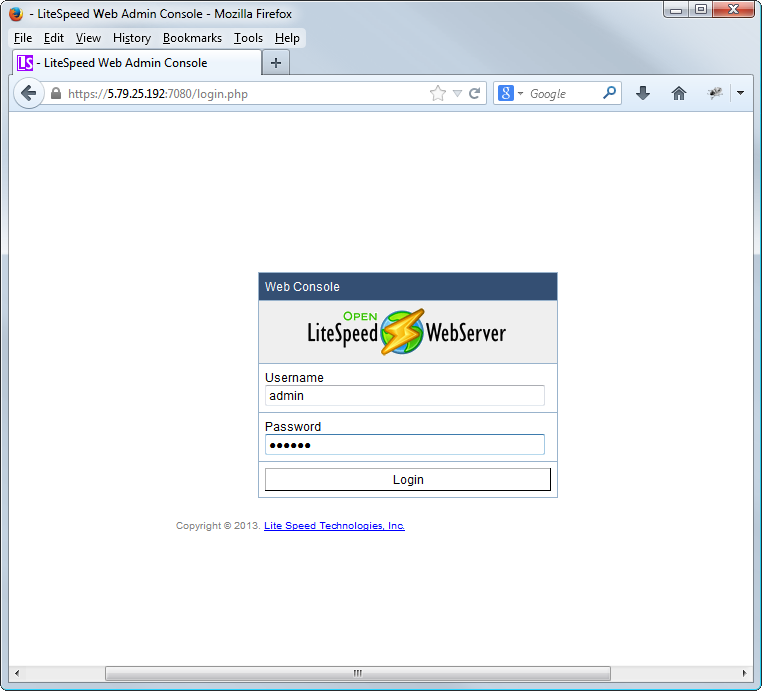
The first thing we will do is change this weak admin password. To do so after logging in click Web Console > General > Security > admin and then enter the current password (123456) followed by the new password you chose and hit save.
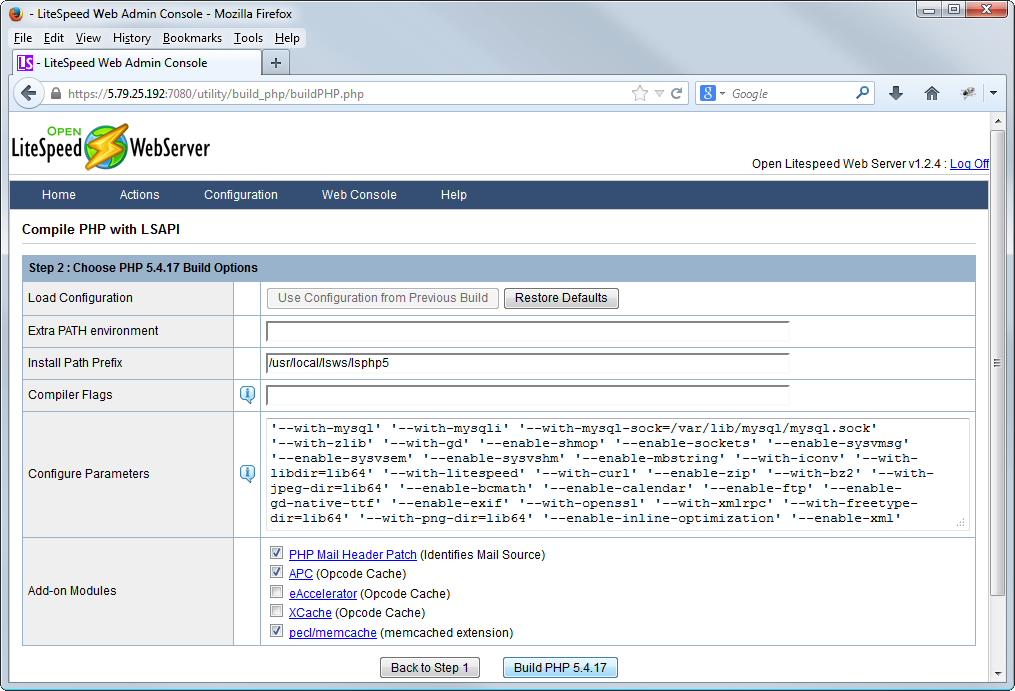
Next, click Actions > Compile PHP.
Select the PHP version you wish to use, for this guide we will use PHP 5.4.17 and hit next.

On this page, the only options we are interested in are the Configure Parameters and the Add-on Modules.
There are 2 ways we can compile PHP at this point, either, a) as a minimal install, with the base essentials for XenForo and a few other minor bits, or b) as a complete "include all" type install, to basically run 99% of anything.
We will run the minimal install, so enter the following into the Configure Parameters box:
And for the Add-on modules I select Mail Source Handler, APC and Memcached, then hit Compile PHP 5.4.17.
OpenLiteSpeed will then download the required packages and configure it. When it is done, hit Next.
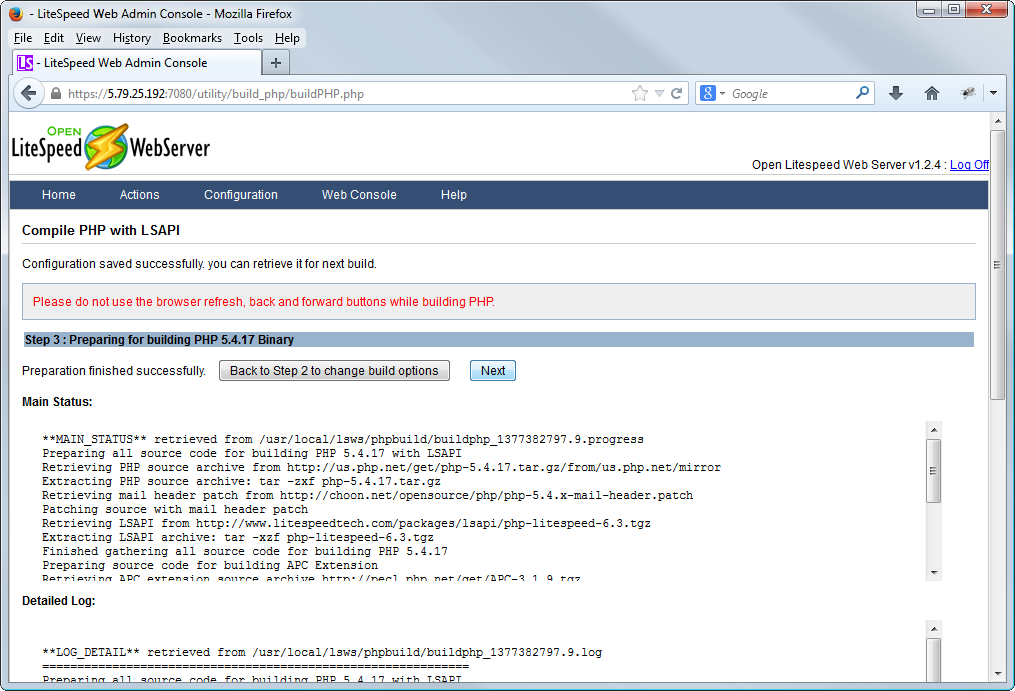
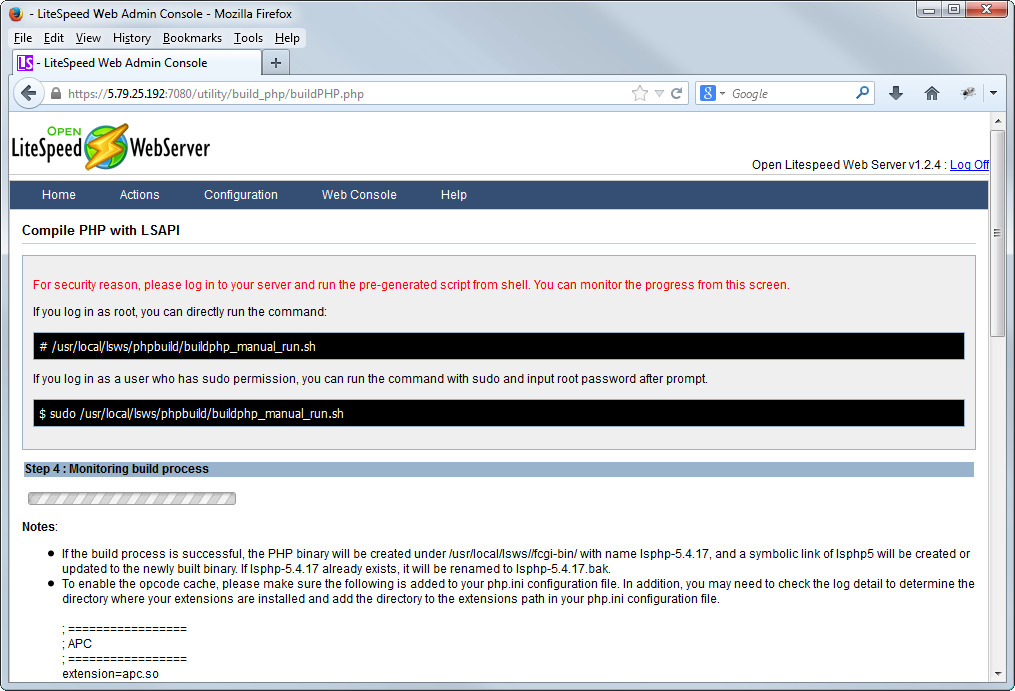
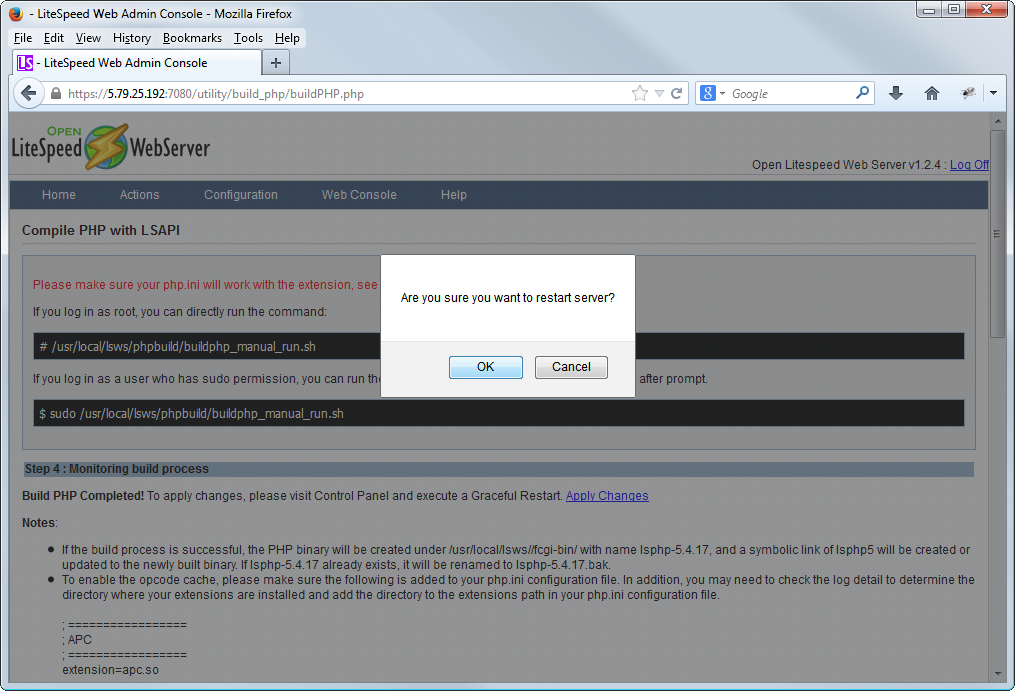
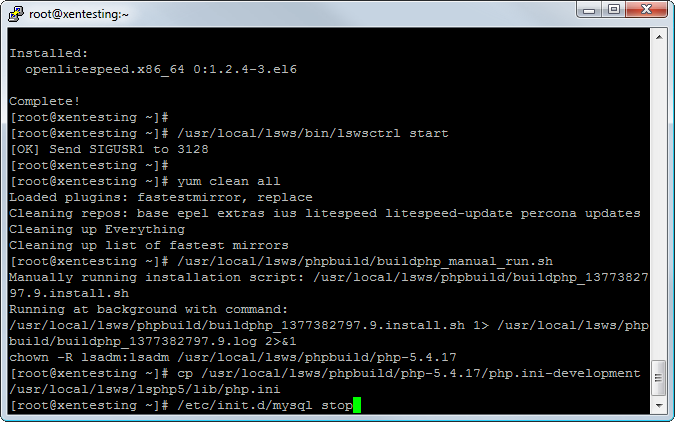
This will bring up the following page, so go back to Putty and enter the command the OpenLiteSpeed has given you at the top black box.

You can then go back to the web page, and watch the progress. This may take some time, 10 minutes is not uncommon.

Head back to putty and copy the php.ini to the right place.

Next, select Actions > Graceful Restart and hit OK
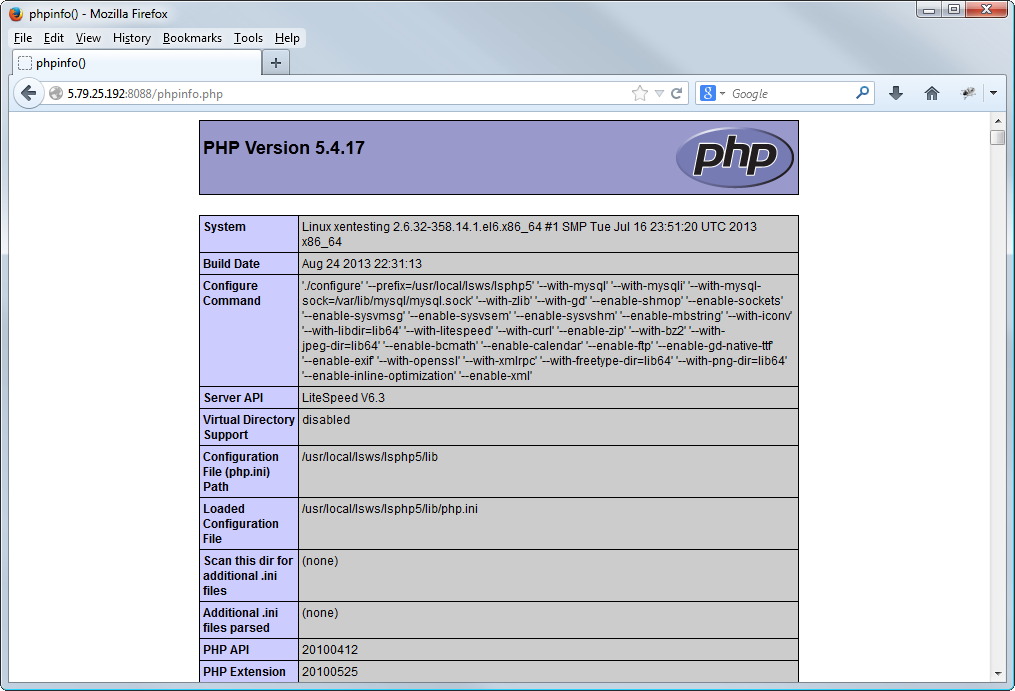
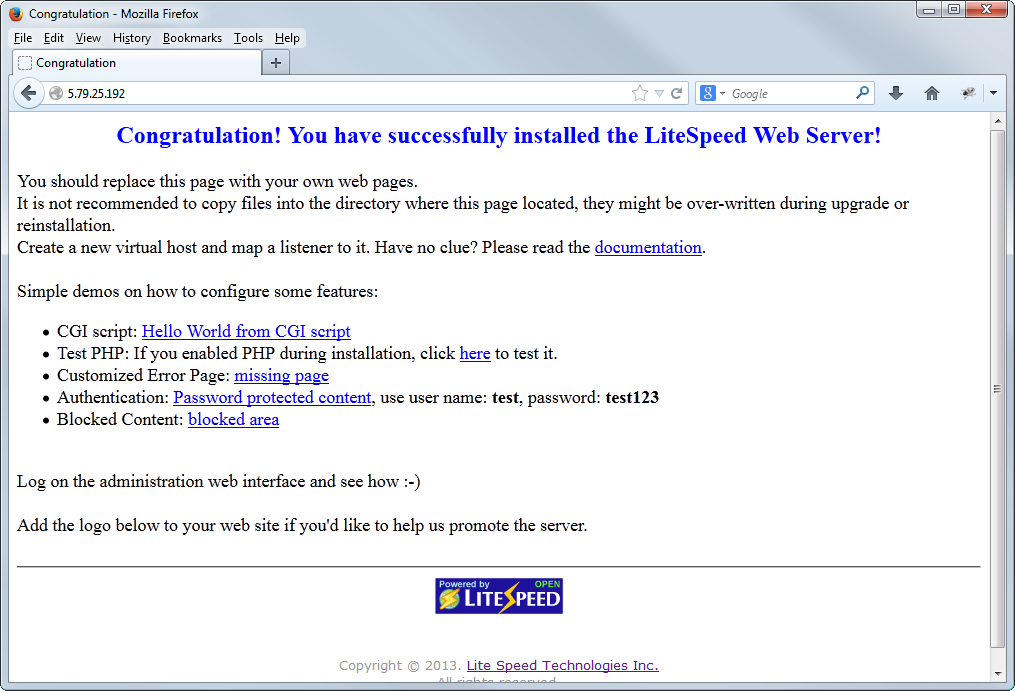
Head to your live URL and test your PHP is working.
If the page loads correctly, PHP is all sorted!
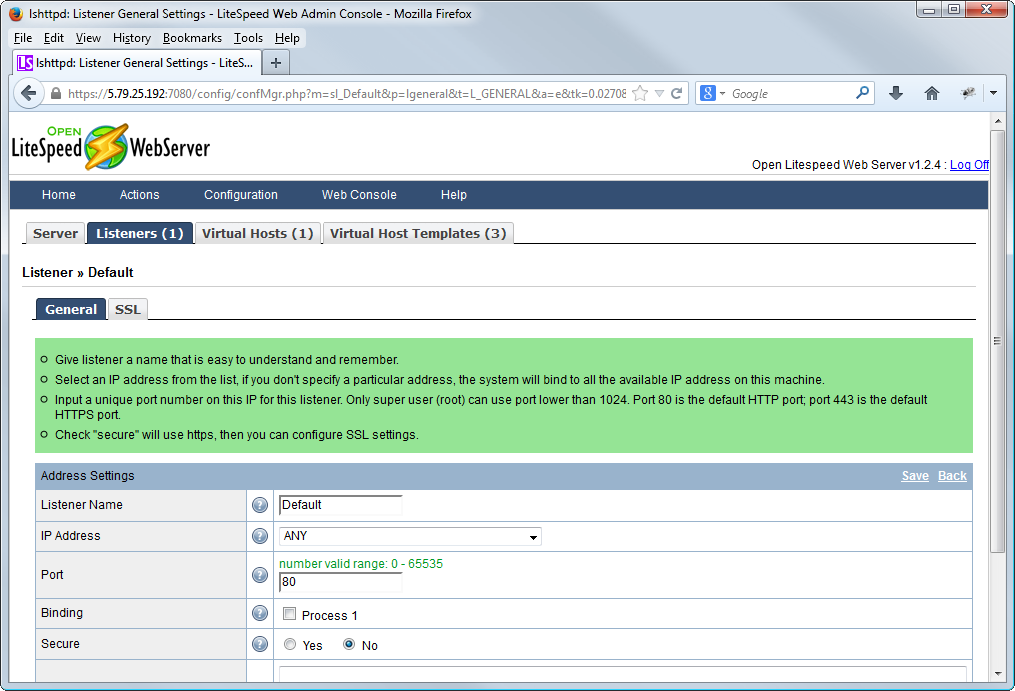
Finally, we need to alter OpenLiteSpeed to serve up from port 80. So in the Admin Panel go to Configuration > Listeners > Default > Edit and change the port from 8088 to 80 and hit Save.
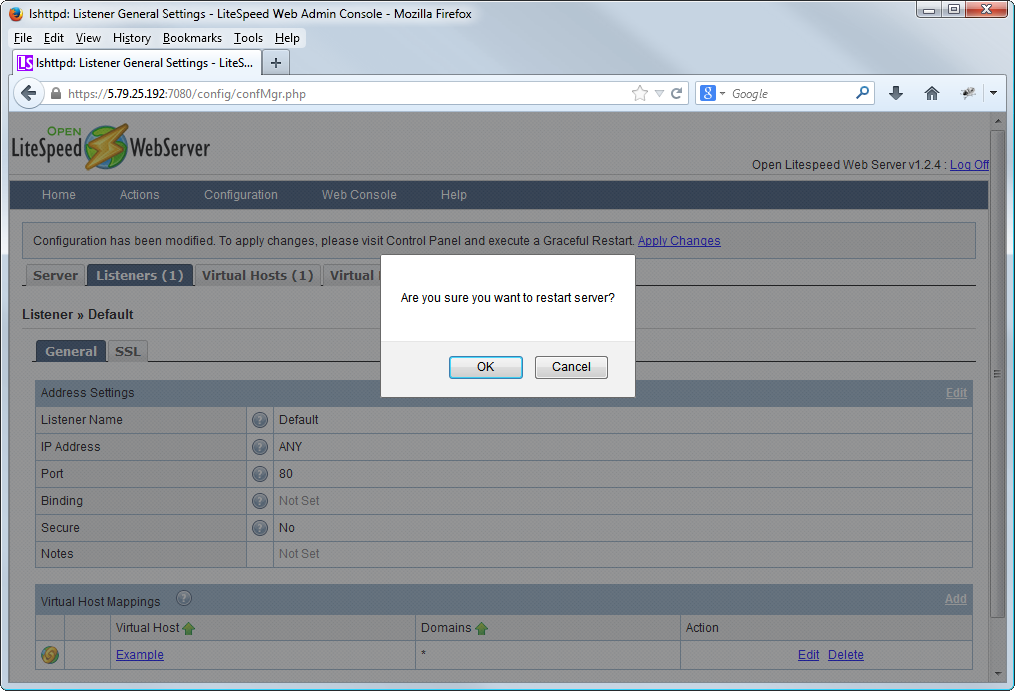
Then, select Actions > Graceful Restart and hit OK.
Check it works correctly once again by simply loading
If it loads, then we have OpenLiteSpeed working correctly!
Time to do some basic MySQL configuration. This will vary from server to server, however as a basic starting point, first open up WinSCP and enter your servers root login information.
First stop MySQL
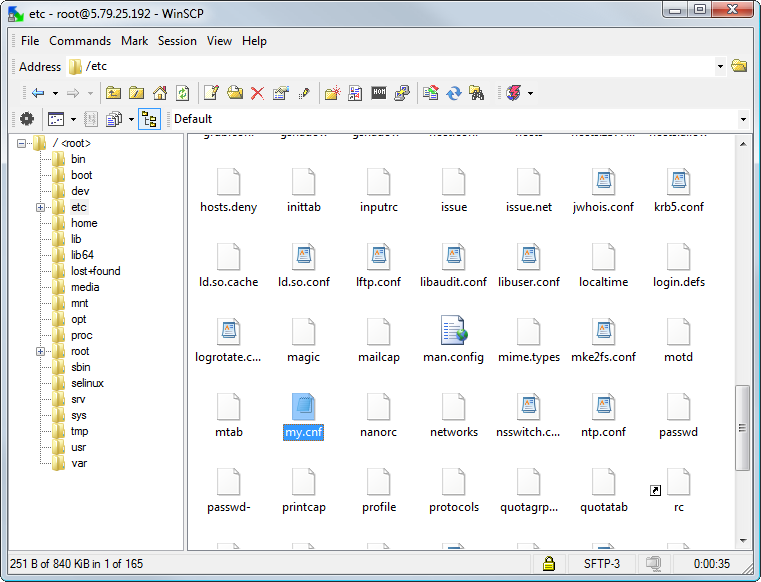
Next, navigate to /etc/ and open my.cnf
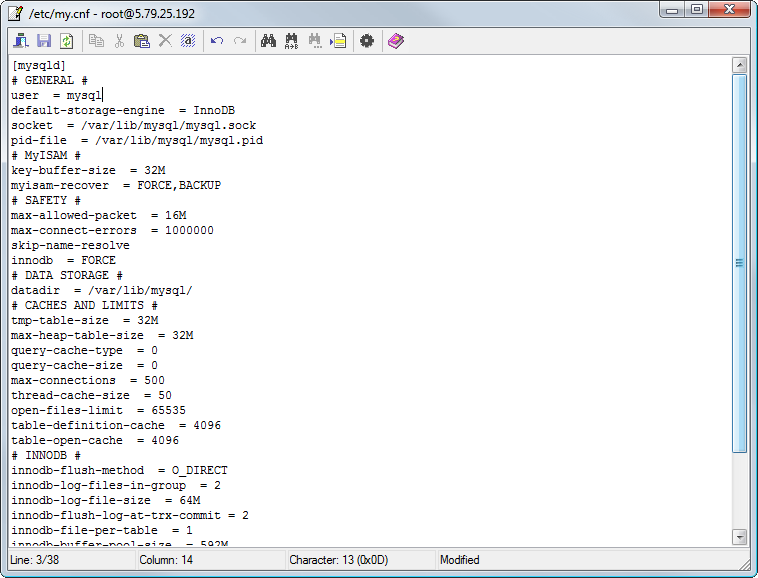
Delete the contents already in place and replace with the following
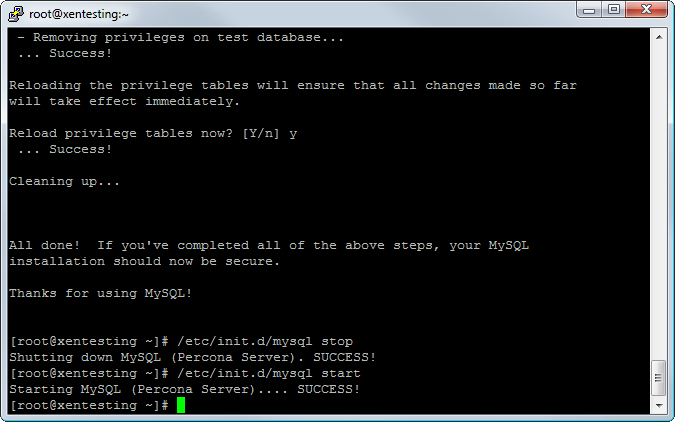
Now go to Putty and restart Percona.
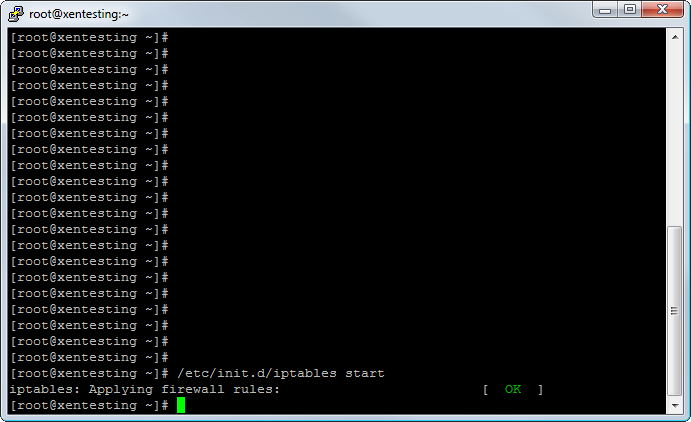
Finally on the list is basic IP Tables configuration. IP Tables can be as complex or as lean as you like. As a basic rule the best methods are to only allow connections you specify, and drop all others.
So lets restart IP Tables
Next, lets load in the following rules
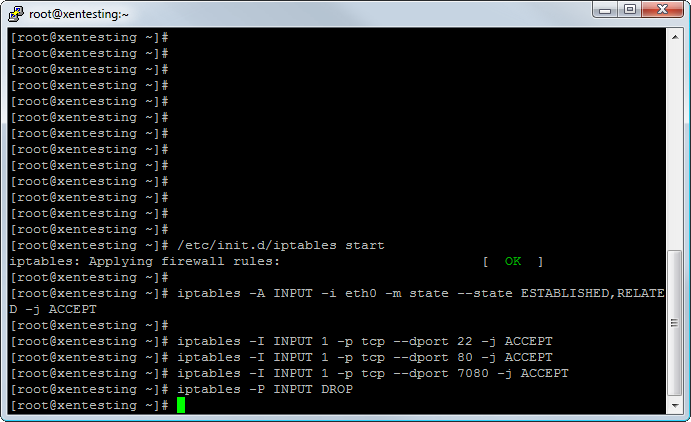
So what do all these do?
The first Allows all established connections, eg ones made by your server though.
The second Allows connections to the SSH port.
The third Allows traffic to the web server.
The fourth Allows you to access the OpenLiteSpeed Admin Panel
And finally, the 5th Denies (drops) connections to all other ports.
How does this secure your server? Well the basic theory is that your IP Tables limit the attack vectors on a server, by only allowing these specific ports, you exclude attackers from finding potential flaws in other running services. The only things they can look to find weaknesses in are the SSH Login, the OpenLiteSpeed Admin Panel or the Web application, and as long as those are kept up to date and are secure, you severely reduce any attackers chances of success. More aggressive IP Tables and services are out there, however that falls down to the individual sysadmin to decide what level of protection they wish to deploy.
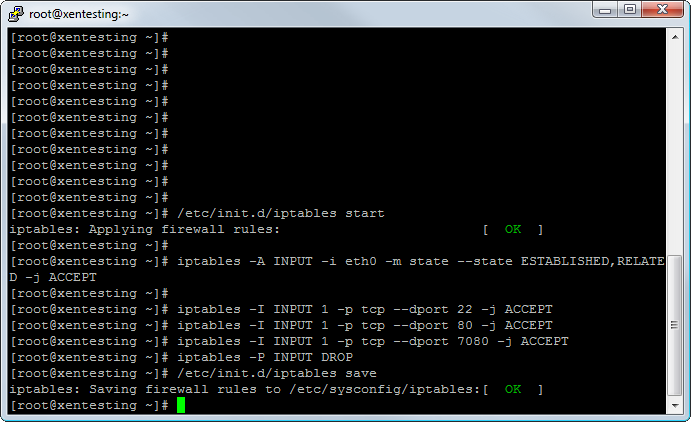
Lets save those IPTables rules, so on a server restart they are applied.
And that concludes Part 2 of this guide! In Part 3, we will install XenForo and PhpMyAdmin.
This guide may not be published, broadcast, rewritten or redistributed in whole or part with out the express written permission of Slavik at XenForo.com. The author takes no responsbility for any steps, in part, or in whole, undertaken by users of this guide and does not guarantee against any losses, material or otherwise.
Introduction
In Part 1 of this guide you updated the system, installed Percona MySQL Server and installed OpenLiteSpeed Web Server.
In Part 2, we will install PHP, do some basic MySQL configuration, configure LiteSpeed to serve files on port 80, and set up basic IP Tables.
Prerequisites
Completed Part 1.
Installation Guide
Firstly we will install PHP. OpenLiteSpeed offers 2 ways of doing this. Either via the web-based PHP configuration utility where you can select the PHP version, and then add your configure parameters, save it and then LiteSpeed will give you a command to run in the Putty client, or, alternatively we can use "yum" to install and maintain PHP for us.
Both ways of installing PHP have their advantages and disadvantages, however, whilst the yum option is easier to initially set up, compiling PHP ourselves via the OpenLiteSpeed Panel allows for greater control in the versions and what we compile PHP to run with.
So lets get PHP compiled.
First go to the OpenLiteSpeed Admin Panel.
Code:
https://YOURSERVERIP:7080And log in with the details
Code:
Username: admin
Password: 123456
The first thing we will do is change this weak admin password. To do so after logging in click Web Console > General > Security > admin and then enter the current password (123456) followed by the new password you chose and hit save.
Next, click Actions > Compile PHP.
Select the PHP version you wish to use, for this guide we will use PHP 5.4.17 and hit next.
On this page, the only options we are interested in are the Configure Parameters and the Add-on Modules.
There are 2 ways we can compile PHP at this point, either, a) as a minimal install, with the base essentials for XenForo and a few other minor bits, or b) as a complete "include all" type install, to basically run 99% of anything.
We will run the minimal install, so enter the following into the Configure Parameters box:
Code:
'--with-mysql' '--with-mysqli' '--with-mysql-sock=/var/lib/mysql/mysql.sock' '--with-zlib' '--with-gd' '--enable-shmop' '--enable-sockets' '--enable-sysvmsg' '--enable-sysvsem' '--enable-sysvshm' '--enable-mbstring' '--with-iconv' '--with-libdir=lib64' '--with-litespeed' '--with-curl' '--enable-zip' '--with-bz2' '--with-jpeg-dir=lib64' '--enable-bcmath' '--enable-calendar' '--enable-ftp' '--enable-gd-native-ttf' '--enable-exif' '--with-openssl' '--with-xmlrpc' '--with-freetype-dir=lib64' '--with-png-dir=lib64' '--enable-inline-optimization' '--enable-xml'OpenLiteSpeed will then download the required packages and configure it. When it is done, hit Next.
This will bring up the following page, so go back to Putty and enter the command the OpenLiteSpeed has given you at the top black box.
Code:
/usr/local/lsws/phpbuild/buildphp_manual_run.shYou can then go back to the web page, and watch the progress. This may take some time, 10 minutes is not uncommon.
Head back to putty and copy the php.ini to the right place.
Code:
cp /usr/local/lsws/phpbuild/php-5.4.17/php.ini-development /usr/local/lsws/lsphp5/lib/php.iniNext, select Actions > Graceful Restart and hit OK
Head to your live URL and test your PHP is working.
Code:
http://YOURSERVERIP:8088/phpinfo.phpFinally, we need to alter OpenLiteSpeed to serve up from port 80. So in the Admin Panel go to Configuration > Listeners > Default > Edit and change the port from 8088 to 80 and hit Save.
Then, select Actions > Graceful Restart and hit OK.
Check it works correctly once again by simply loading
Code:
http://YOURSERVERIP/Time to do some basic MySQL configuration. This will vary from server to server, however as a basic starting point, first open up WinSCP and enter your servers root login information.
First stop MySQL
Code:
/etc/init.d/mysql stopNext, navigate to /etc/ and open my.cnf
Delete the contents already in place and replace with the following
Code:
[mysql]
# CLIENT #
port  = 3306
socket  = /var/lib/mysql/mysql.sock
[mysqld]
# GENERAL #
user  = mysql
default-storage-engine  = InnoDB
socket  = /var/lib/mysql/mysql.sock
pid-file  = /var/lib/mysql/mysql.pid
# MyISAM #
key-buffer-size  = 32M
myisam-recover  = FORCE,BACKUP
# SAFETY #
max-allowed-packet  = 16M
max-connect-errors  = 1000000
skip-name-resolve
innodb  = FORCE
# DATA STORAGE #
datadir  = /var/lib/mysql/
# CACHES AND LIMITS #
tmp-table-size  = 32M
max-heap-table-size  = 32M
query-cache-type  = 0
query-cache-size  = 0
max-connections  = 500
thread-cache-size  = 50
open-files-limit  = 65535
table-definition-cache  = 4096
table-open-cache  = 4096
# INNODB #
innodb-flush-method  = O_DIRECT
innodb-flush-log-at-trx-commit = 2
innodb-file-per-table  = 1
innodb-buffer-pool-size  = 592M
# LOGGING #
log-error  = /var/lib/mysql/mysql-error.log
slow-query-log  = 1
slow-query-log-file  = /var/lib/mysql/mysql-slow.log
Now go to Putty and restart Percona.
Code:
/etc/init.d/mysql startFinally on the list is basic IP Tables configuration. IP Tables can be as complex or as lean as you like. As a basic rule the best methods are to only allow connections you specify, and drop all others.
So lets restart IP Tables
Code:
/etc/init.d/iptables startNext, lets load in the following rules
Code:
iptables -A INPUT -i eth0 -m state --state ESTABLISHED,RELATED -j ACCEPT
Code:
iptables -I INPUT 1 -p tcp --dport 22 -j ACCEPT
Code:
iptables -I INPUT 1 -p tcp --dport 80 -j ACCEPT
Code:
iptables -I INPUT 1 -p tcp --dport 7080 -j ACCEPT
Code:
iptables -P INPUT DROPSo what do all these do?
The first Allows all established connections, eg ones made by your server though.
The second Allows connections to the SSH port.
The third Allows traffic to the web server.
The fourth Allows you to access the OpenLiteSpeed Admin Panel
And finally, the 5th Denies (drops) connections to all other ports.
How does this secure your server? Well the basic theory is that your IP Tables limit the attack vectors on a server, by only allowing these specific ports, you exclude attackers from finding potential flaws in other running services. The only things they can look to find weaknesses in are the SSH Login, the OpenLiteSpeed Admin Panel or the Web application, and as long as those are kept up to date and are secure, you severely reduce any attackers chances of success. More aggressive IP Tables and services are out there, however that falls down to the individual sysadmin to decide what level of protection they wish to deploy.
Lets save those IPTables rules, so on a server restart they are applied.
Code:
/etc/init.d/iptables saveAnd that concludes Part 2 of this guide! In Part 3, we will install XenForo and PhpMyAdmin.
Last edited:
")